Exercises 2020
This page will be populated with all exercises given in the class. Use it as a reference for compiling your documentation
Exercise 1.1: Electricity
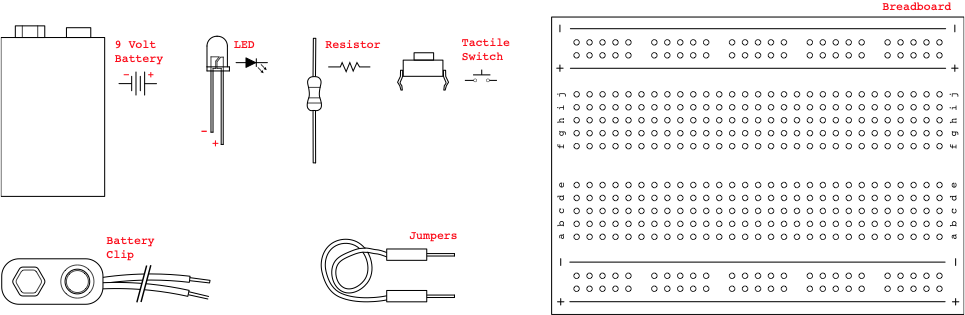
Using the materials shown, create a circuit with an LED that can be switched on and off.
Exercise 1.2: Electricity
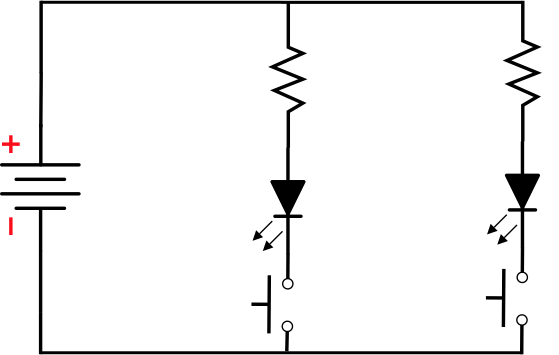
Add another LED to your circuit from exercise 1.1, that can be controlled by it’s own button.
Exercise 2.1: Arduino Blinky
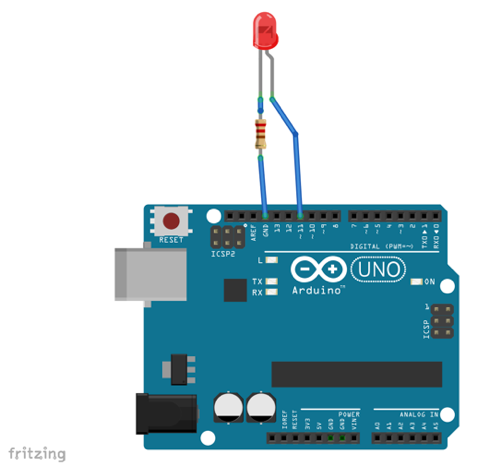
Connect an LED and Resistor (150 ohm) to your Arduino to GND and Pin 11 using your breadboard. Code it to blink using the examples.
Exercise 2.2: More Blinkys

Connect two more LED and Resistors to your Arduino. Code it to blink a sequence on all LED.
Exercise 3.1: Voltage Divider
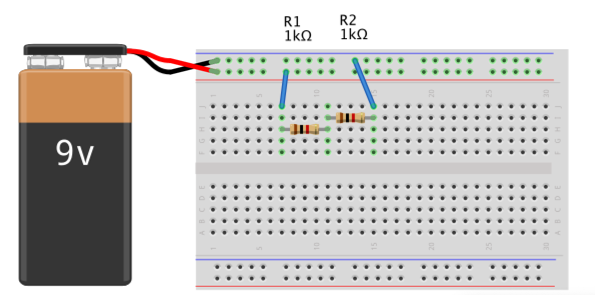
Assembly the circuit with resistors of two different values. Try calculating the voltage between your resistors, and check with the multimeter if it’s correct.
Exercise 3.2: Light Sensor
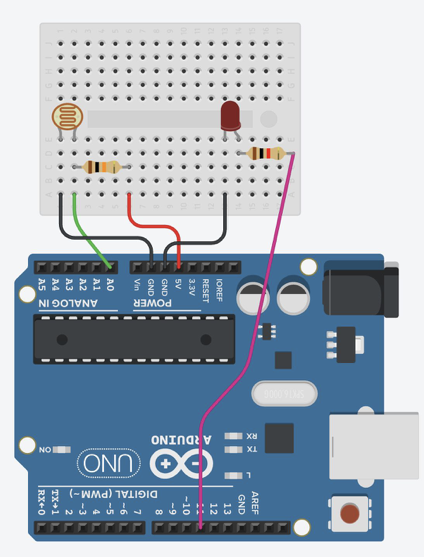
Build a circuit and code it to turn on an LED when it gets dark using a Photoresistor.
Optional: code it so the LED fades smoothly between dark and light states.
Exercise 3.3: Reverse Parking helper
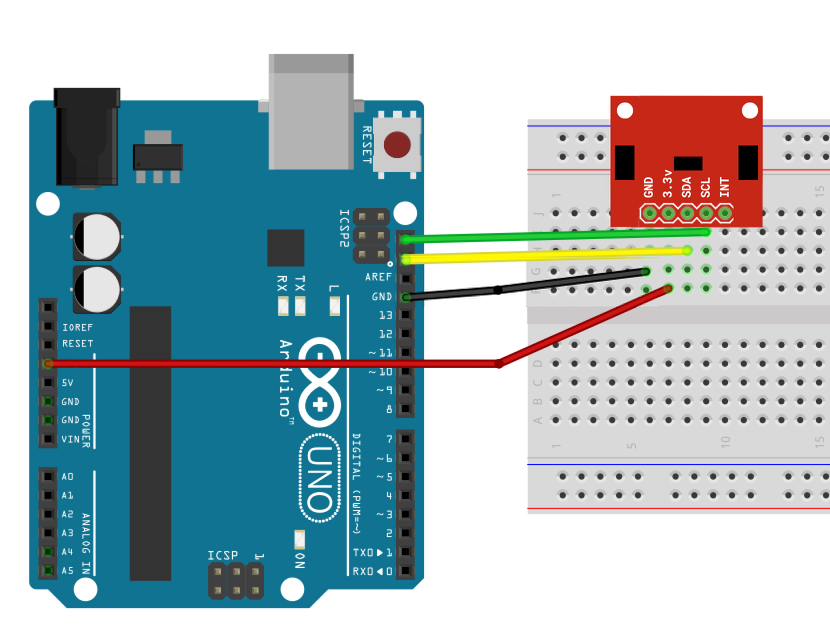
Using the VCNL 4040, build a circuit with at least 3 led’s and code it show proximity level (i.e as an object moves closer, more led’s turn on)
Alternative: Operate a motor so it “reverses” itself until it is too close to an object.
Exercise 5.0: Sensor visualizer
Create a visual output on your computer from one sensor, using Arduino and Processing.
Steps:
- Using one of the sensors you have been provided, research on how to correctly connect up the sensor, install a library and get a basic example up and running.
- Output at least one value from the sensor over serial, and interpret that information in a visual form using processing.
What if I can't get either of my sensors to work? Use the VCNL4040 that you already used in the exercise 3.3.
Exercise 7.1:
Build a stopwatch with the smart servo and two buttons.
The movement of servo indicates the seconds elapsed.
Clicking the first button starts and stops the stopwatch. The 2nd button resets the stopwatch.
TIP: Use the millis() function to find the elapsed time.
Exercise 7.2:
Develop an interactive device, taking inputs from one sensor and providing a physical output such as lights or movement.
| Sound (Buzzer or Loudspeaker) | Movement (Motor, Solenoid, Servo) | Light (LED, neopixel, lightbulb, laser) | Tactile (vibration motor, actuator, Peltier element) | Graphic Display (OLED, LCD, 7 segments, Printer, laptop screen with Processing) | |
| Sound (microphone, piezo) | |||||
| Movement (distance, motion, gesture, gyro, pressure, flex sensor) | |||||
| Atmospheric (Temperature, humidity, air quality, pressure) | |||||
Bio-sensor (Pulse, GSR, EMG) | |||||
| Light (colour, luminance, IR) | |||||
| Touch (buttons, pressure, capacitance) |