Digital Outputs (en)
German Version
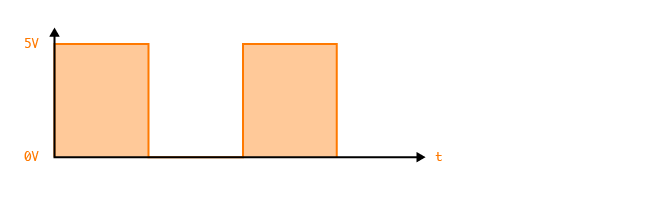
The digital output is the simplest way to generate an electronic signal on an Arduino. This signal only knows two states, ON and OFF. With the Arduino, ON stands for a voltage of 5V and OFF for a voltage of 0V or a connection to GND. The easiest way to visualize the functionality of the digital output is to switch an LED on and off. A series resistor is required for this since most LEDs cannot withstand a voltage of 5V and we first have to "destroy" voltage through the resistor. For the calculation, we need the forward voltage (VF) and the forward current (IF) of the LED. We find this information in the datasheet of the LED.
Functions
The corresponding function for setting a pin output value is:
digitalWrite(PIN, Value);
Value can be set to HIGH or LOW at the specified PIN.
Current Limiting resistor
The value of the current limiting resistor (RV), which is necessary to limit the current at the LED to that specified in the datasheet, is calculated using Ohm's law (U = R * I). For this, we need the following information.
Uges = applied voltage (Arduino = 5V)
I = forward current of the LED (data sheet IF value)
UD = forward voltage of the LED (data sheet VF value)
The formula for the calculation is:
Current Limiting resistor = (applied voltage - forward voltage LED) / forward current LED
RV = (Uges-UD)/I
An LED is very sensitive to too much current and can then burn out quickly or its service life is extremely shortened. It is therefore advisable to always use the next higher resistance value than the one calculated. Further information on the current limiting resistor.

LED Blinking
Here is an example circuit for a green LED. The datasheet of the LED indicates the forward voltage is 2V and the forward curent of 25mA. This results in the following calculation:
RV = (Uges - UD) / I
RV = (5V - 2V) / 0.025A
RV = 3V / 0.025A
RV = 120 Ω
For programming, we have to switch the digital PIN 13 on and off again and again if we want to make the LED flash. The following code does just that.
void setup()
{
  // initialize digital pin 13 as an output.
  pinMode(13, OUTPUT);
}
// the loop function runs over and over again forever
void loop()
{
  digitalWrite(13, HIGH);   // turn the LED on (HIGH is the voltage level)
  delay(1000);              // wait for a second
  digitalWrite(13, LOW);    // turn the LED off by making the voltage LOW
  delay(1000);              // wait for a second
}
Exercises
1. Use the blink example (Examples / Basic / Blink) and add a second LED.
2. Open the BlinkWithout Delay example (Examples / Digital / BlinkWithoutDelay) and examine the concept.
3. Program an animation with 3 LEDs, where the light moves from one side to the other.
4. Defines its own function void blinkLED (int _Pin, int _duration) which allows different LEDs to blink at different speeds.
void setup() {
  // initialize the digital pin as an output.
  // Pin 13 has an LED connected on most Arduino boards:
  pinMode(13, OUTPUT);
  pinMode(12, OUTPUT);
}

void loop() {
  digitalWrite(13, HIGH);   // set the LED on
  digitalWrite(12, HIGH);   // set the LED on
  delay(1000);              // wait for a second
  digitalWrite(13, LOW);    // set the LED off
  digitalWrite(12, LOW);    // set the LED off
  delay(1000);              // wait for a second
}
// constants won't change. Used here to
// set pin numbers:
const int ledPin =  13;      // the number of the LED pin

// Variables will change:
int ledState = LOW;             // ledState used to set the LED
long previousMillis = 0;        // will store last time LED was updated

// the follow variables is a long because the time, measured in miliseconds,
// will quickly become a bigger number than can be stored in an int.
long interval = 1000;           // interval at which to blink (milliseconds)

void setup() {
  // set the digital pin as output:
  pinMode(ledPin, OUTPUT);
}

void loop()
{
  // here is where you'd put code that needs to be running all the time.

  // check to see if it's time to blink the LED; that is, if the
  // difference between the current time and last time you blinked
  // the LED is bigger than the interval at which you want to
  // blink the LED.
  unsigned long currentMillis = millis();

  if(currentMillis - previousMillis > interval) {
    // save the last time you blinked the LED
    previousMillis = currentMillis;

    // if the LED is off turn it on and vice-versa:
    if (ledState == LOW)
      ledState = HIGH;
    else
      ledState = LOW;

    // set the LED with the ledState of the variable:
    digitalWrite(ledPin, ledState);
   }
}
#define LED_ONE 13
#define LED_TWO 12
#define LED_THR 11

void setup()
{
  pinMode(LED_ONE, OUTPUT);
  pinMode(LED_TWO, OUTPUT);
  pinMode(LED_THR, OUTPUT);
}

void loop()
{
  for(int i=13; i<11; i--)
  {
    digitalWrite(i, HIGH);
    delay(500);
    digitalWrite(i, LOW);
    delay(500);
  }

  for(int i=11; i<=13; i++)
  {
    digitalWrite(i, HIGH);
    delay(500);
    digitalWrite(i, LOW);
    delay(500);
  }
}
int ledPins[3] = {8,9,10}; // Alle LED Pins in einem Array initialisieren
boolean ledStates[3] = {false, false, false}; // Alle LED Status speichern
long previousMillis[3] = {0,0,0}; // Die Zeiten speichern

void setup()
{
  for(int i=0; i<3; i++)
  {
    pinMode(ledPins[i], OUTPUT); // Alle LED Pins sind Output
  }
}

void loop()
{
  blinkLED(1, 100);  // Aufrufen unserer Funktion
  blinkLED(2, 1000);
  blinkLED(3, 500);
}

void blinkLED(int _Pin, int _duration) // Eigene Funktion
{
  if(millis() - previousMillis[_Pin-1] > _duration) // Ist genug Zeit vergangen?
  {
    previousMillis[_Pin-1] = millis(); // Zeit speichern
    ledStates[_Pin-1] != ledStates[_Pin-1];  // Den LED State umdrehen (wenn AUS dann AN)
    digitalWrite(ledPins[_Pin-1], ledStates[_Pin-1]); // State setzen
  }
}