H-Bridge
A H-bridge is an integrated circuit that can control the direction of DC current. This makes it perfect to control the direction of DC motors. Unlike using a transistor as switch, with an H-bridge we are able to make the motor turn in one direction or the other. There are different types of H-bridges, which differ slightly in their characteristics - especially in power. However, the pin assignment is the same for most H-bridges. The most used H-Bridges are the SN754410 (datasheet) or L293D (datasheet). In the following illustration, you can see the example of an SN754410.
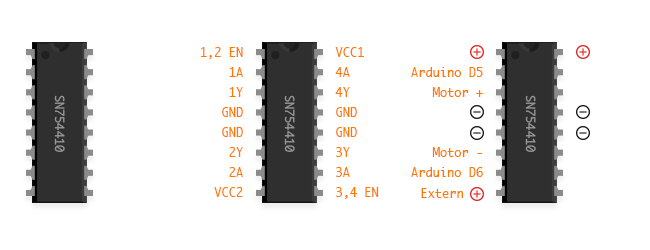
One motor can be controlled on each side of the H-bridge. First, however, all connections for the power supply should be connected. These are GND for ground, VCC1 for the 5V supply and VCC2 for an external voltage source (observe motor specifications). Pins 1A, 2A, 3A and 4A are used to set the direction of rotation (direction of flow of the voltage). The logic is: If 1A HIGH and 2A LOW, then the motor turns in one direction, if 1A LOW and 2A HIGH, then the motor turns in the other direction. The same goes for pins 3A and 4A. The motor itself is connected to pins 1Y, 2Y or 3Y, 4Y. The H-bridges can be switched on or off by using pins 1,2 EN and 3,4 EN. A PWM signal (see Pulse Width Modulation) can also be applied here to influence the speed of the motor.
Another benefit can be the use of an H-bridge to control a stepper motor. This tutorial shows how to do this.
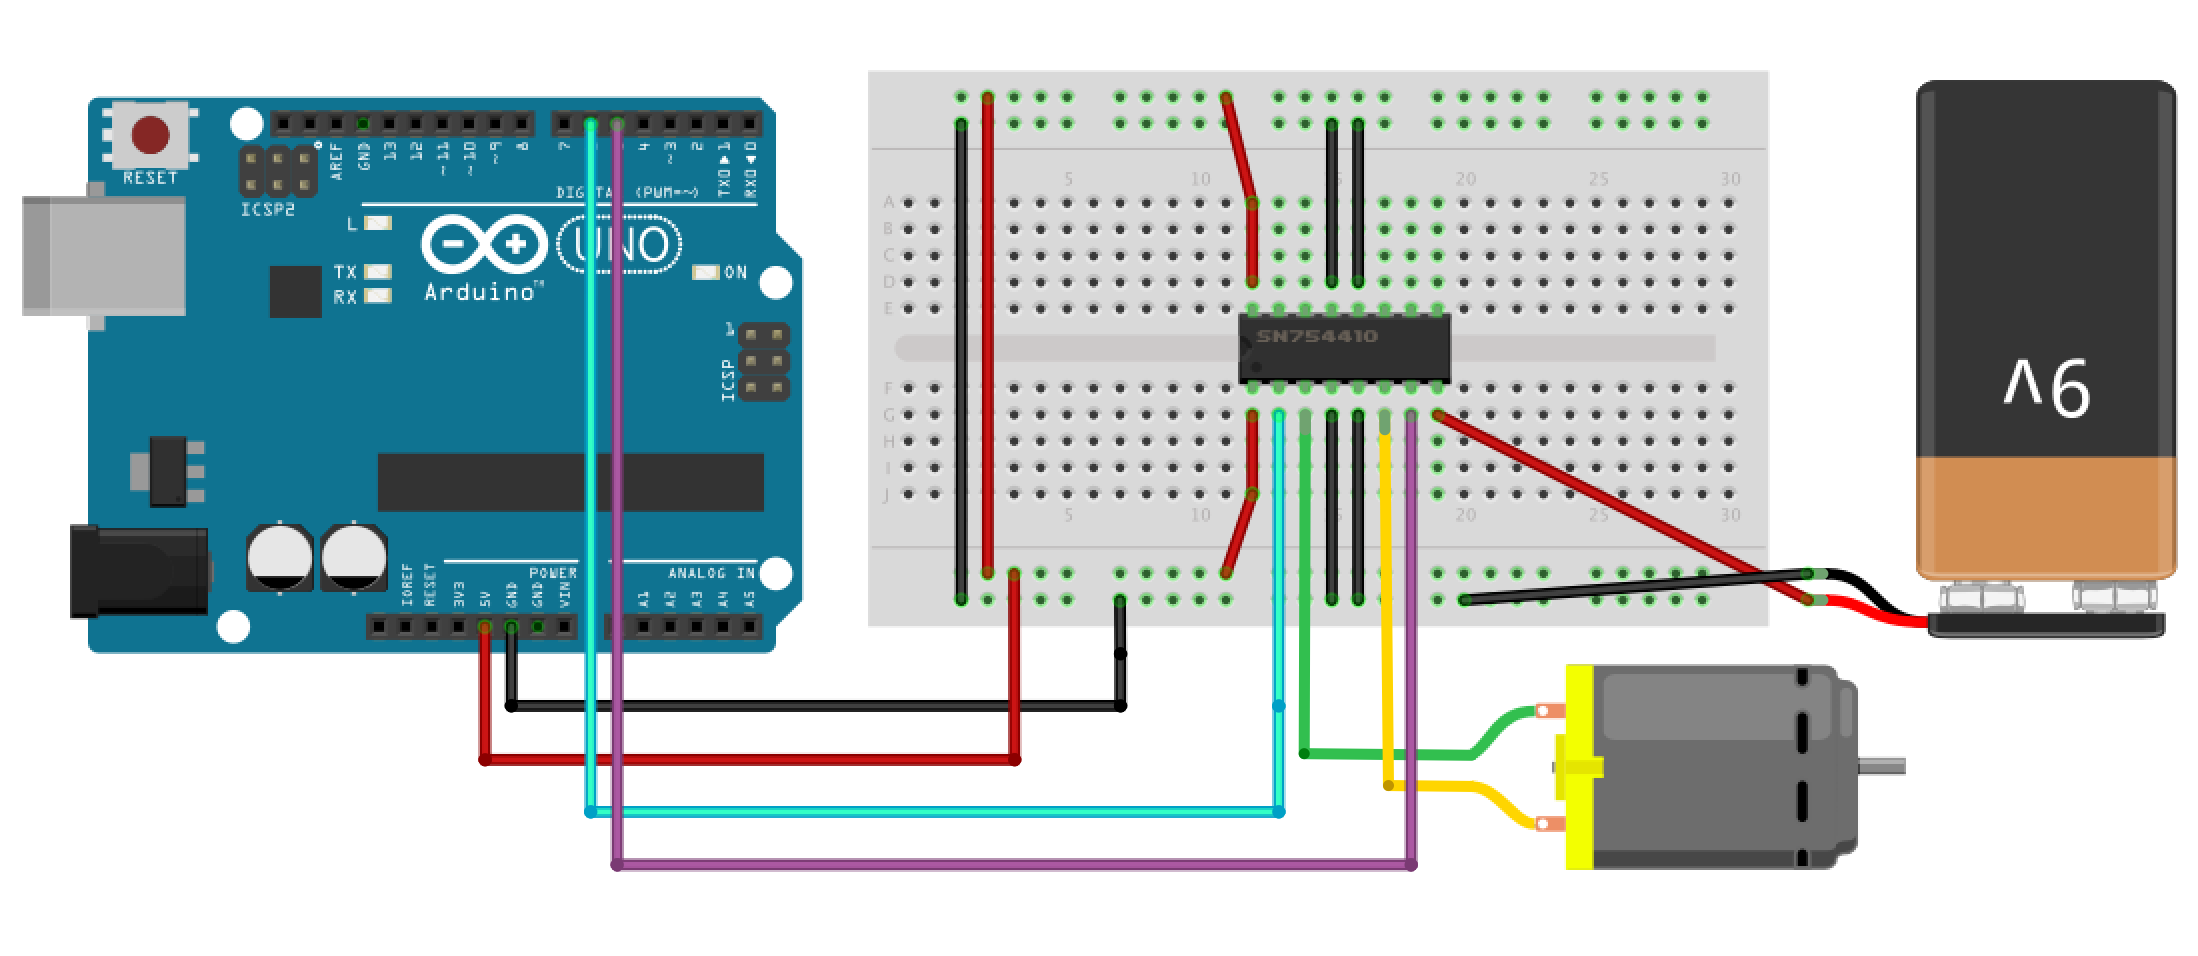
Example
1x Arduino
1x H-Bridge SN754410 (Datasheet)
1x DC Motor
Exercise
1. Use a push button to change the running direction of the motor.
2. Add a way of controlling the speed as well as direction, such as a potentiometer.
Further Information:
H-Bridge - Wikipedia
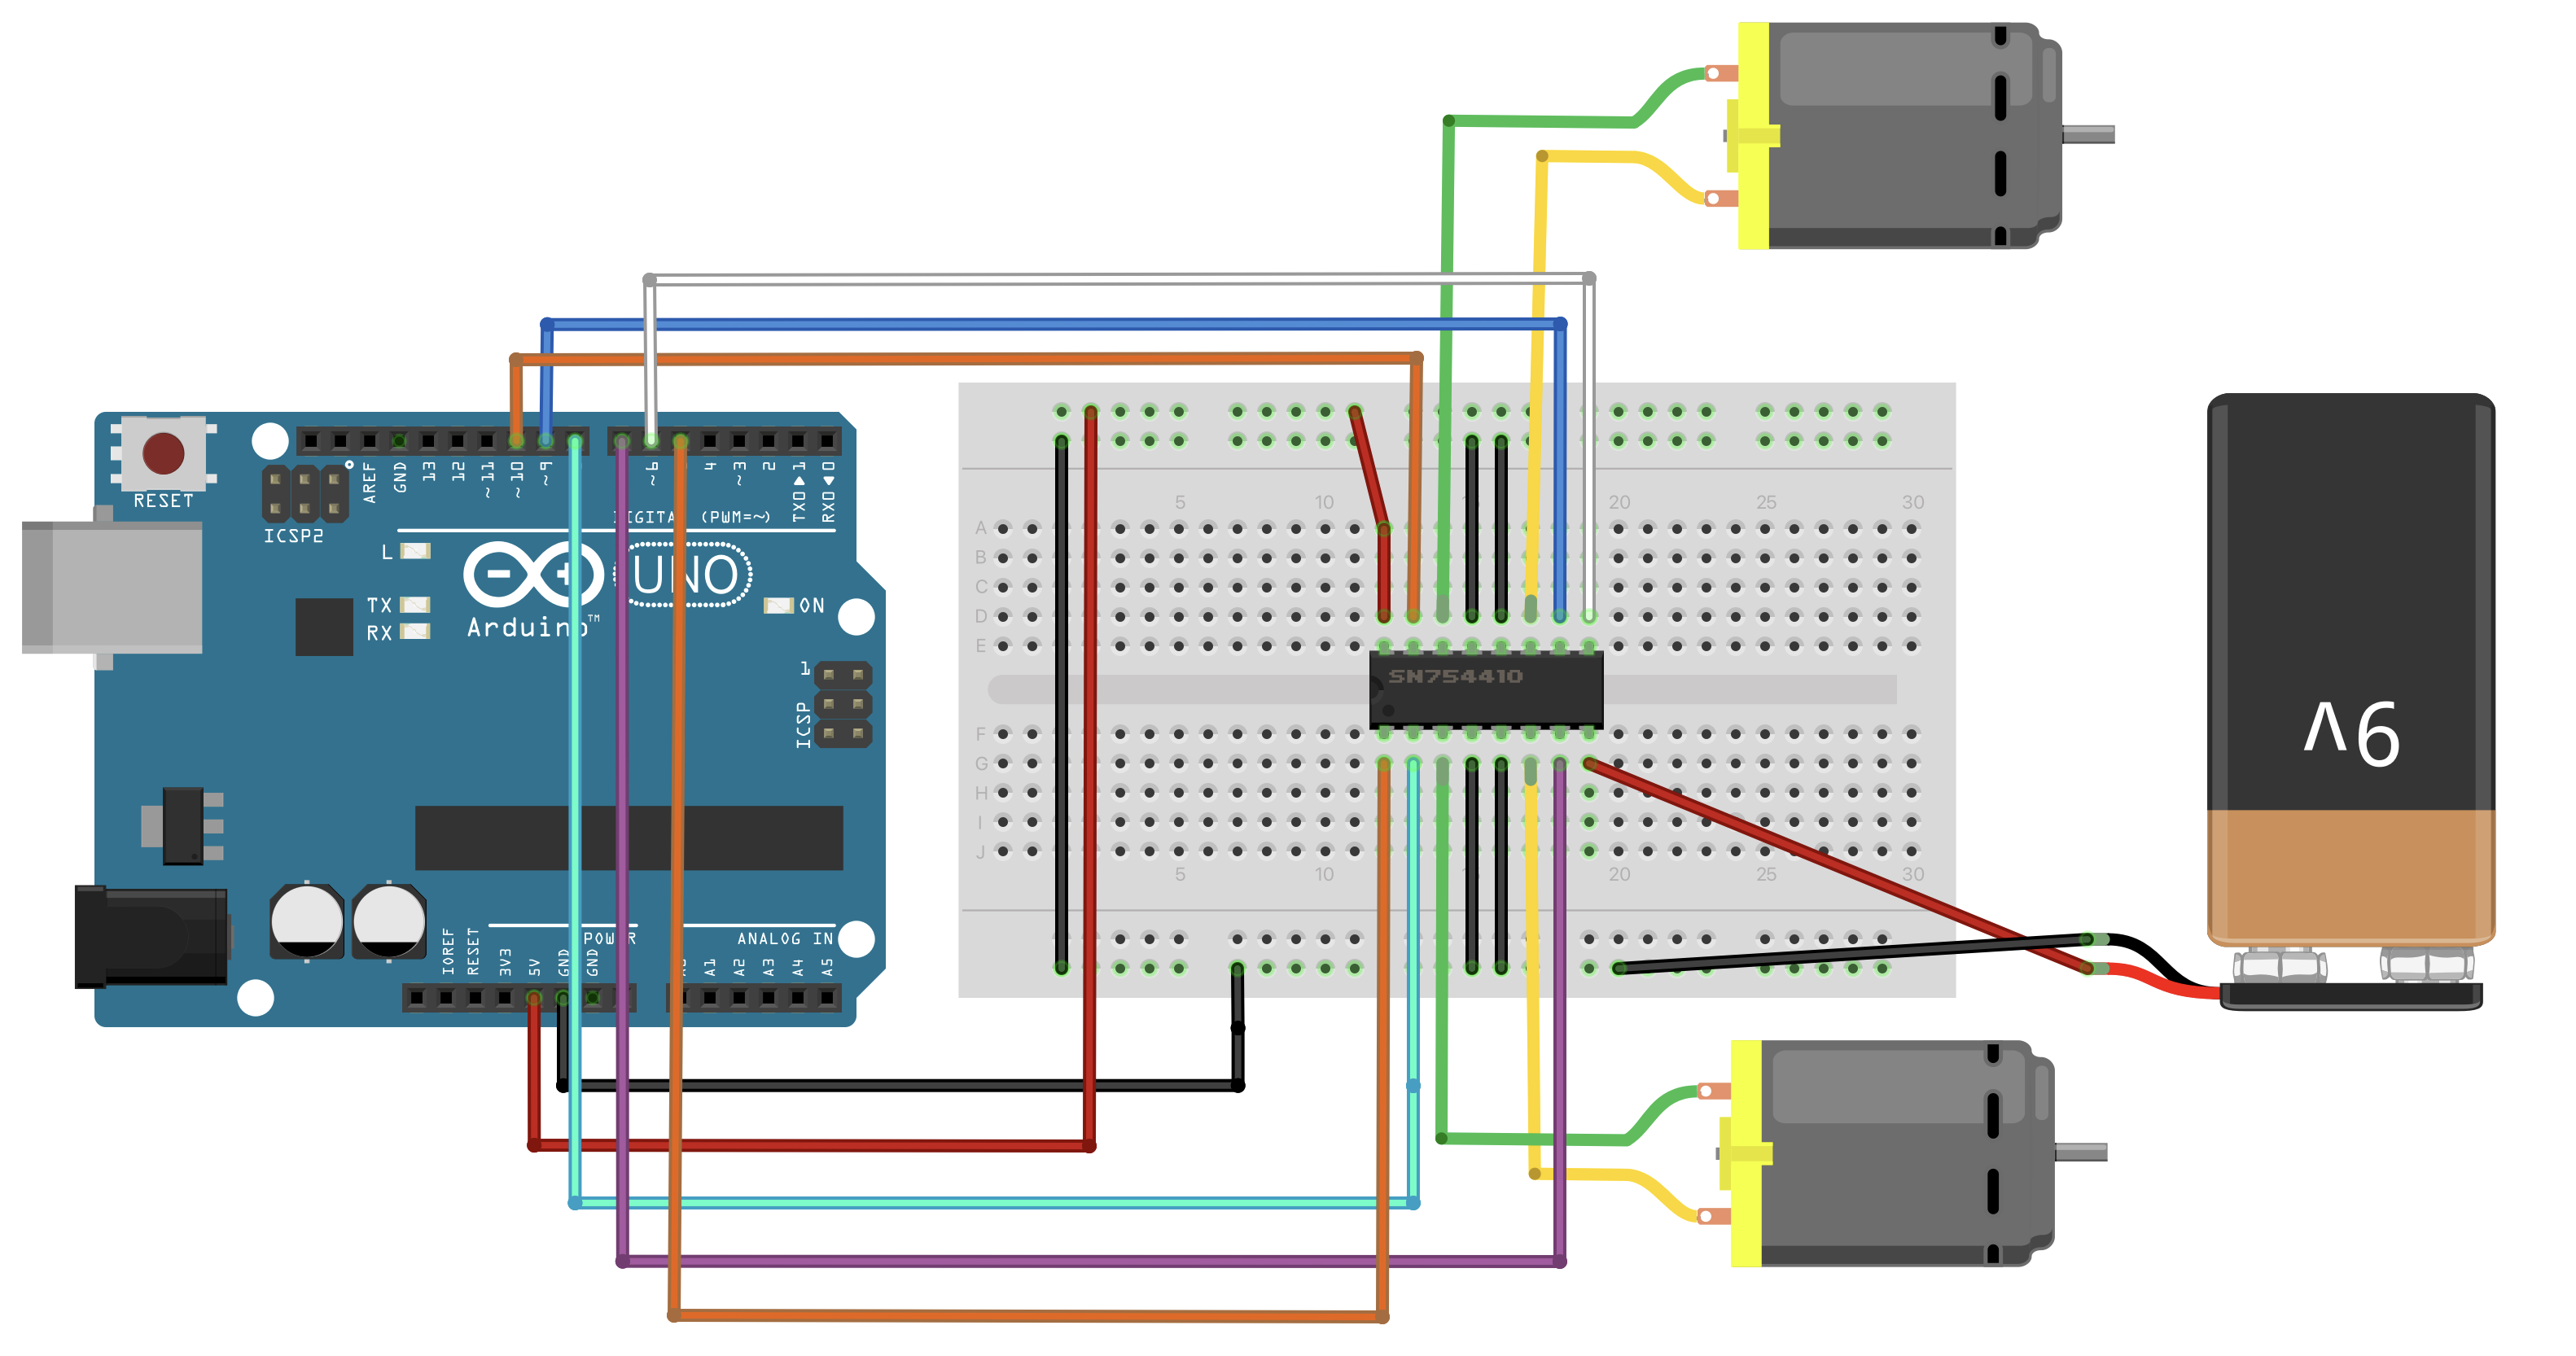
Using Two Motors
Here is an example with two motors. Remember, you can supply 9 volts to the VIN pin on the Arduino to run everything with the 9-volt battery.