Collect and store data with shiftr.io and Processing
This is a step by step manual for getting started with shiftr.io (desktop application), shiftr.io pocket and Processing. The goal is to collect data via shiftr.io Pocket and to store this in an .csv file.
Step 1 – Set up shiftr.io
Create an acount on shiftr.io, and follow the instructions on the getting started page to create a new namespace and a new token.
Additionally, download and install the desktop app.
Step 2 – Set up Processing
Also you need to make sure that you're running the latest version of Processing. If you have an old version or haven’t Processing installed at all, get it from their website.
Afterwards, download the processing-mqtt library from the GitHub repository. When the download has finished, move the library to your sketch folders libraries directory. More information about installing a library can be found here.
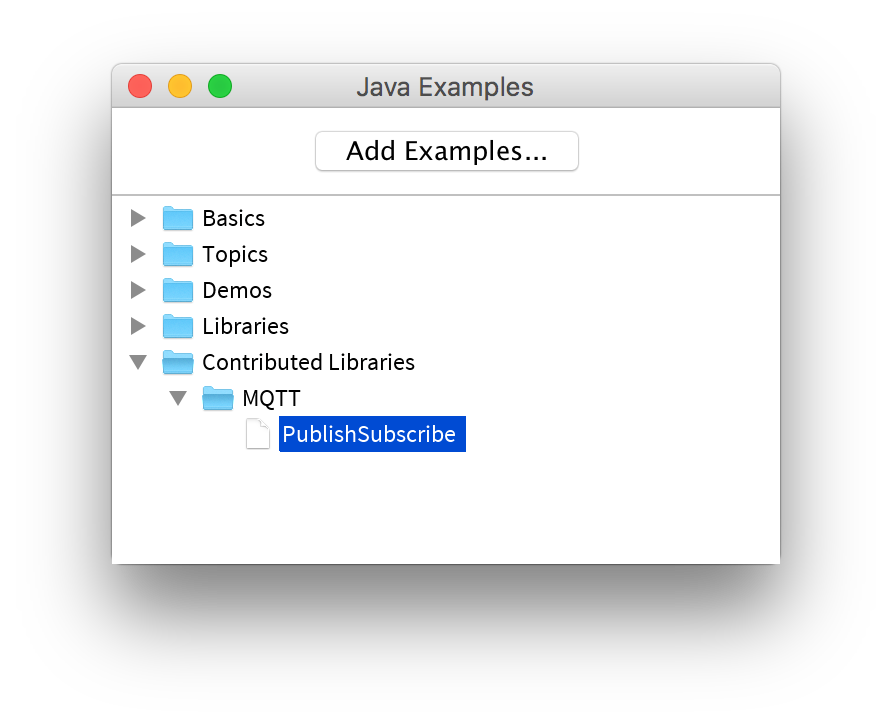
To verify that everything worked as expected, go to Files > Examples and open the MQTT > PublishSubscribe example. This example sketch will connect to the try namespace and send a hello world message on every keypress.
Run the example and check the console for the following line: [MQTT] connected to: broker.shiftr.io. If you see the connected client and the messages flowing in the real-time graph, you are ready to go!
Step 3 – Shiftr.io Desktop
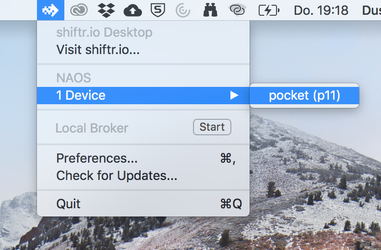
Please choose your device by clicking on the Shiftr.io icon in your menu bar. In this example it's pocket (p11). Make sure your Bluetooth is switched on.
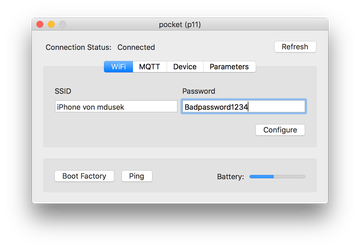
Wifi:
Of course, you need to be connected to a network to use Shiftr.io. We can f.e. use an iPhone hotspot, so you can be more flexible and don't have to stay within the reach of the local router. Or we simply connect to the Bridge routers (SSID: BRIDGE / Password: internet). Don't forget to press Configure.
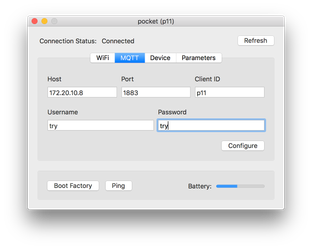
MQTT:
As soon as you're connected to the network of your choice, use the domain name of Shiftr.io in the Host field: broker.shiftr.io. The MQTT Port is 1883 and the Client ID is the name of your connected device. Because we're using the try namespace, the Username and Password is both «try». Of course, you can use your own namespace here.

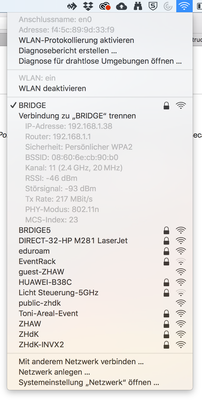
When using Lokal Broker:
The Host field needs your IP-adress. Check with «alt» + click on the wifi icon in your Menu Bar. You need to have a router although it has no internet connection. (Later in the Processing script, don't forget to change the address from broker.shiftr.io to your IP address.)
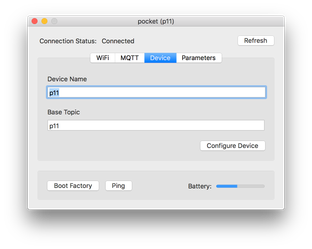
Device:
Make sure you've got the right Device Name and Base Topic. Here, it's the same as your Client ID.
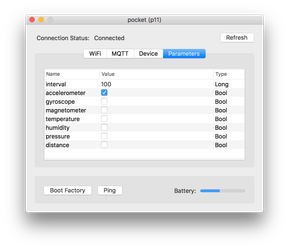
Parameters:
You can choose which sensors should be activated. Remember that having multiple sensors active can make the battery of your device unload faster.
Once you have connected your sensor device and it's sending the collected data through shiftr.io, we can start saving that data. We want to do this through a simple Processing file.
Step 4 – Store data
Use the following Processing script to store the received data in an .csv file. In this example, we're working with the distance sensor, because it's an easy, absolute data type to work with.
Please note: Change the URI (here: "mqtt://try:try@broker.shiftr.io") to the one you are connected to. And don't forget to subscribe to the right device (here: p11) with the activated sensor (here: dst).
acc – Accelometer
gyr – Gyroscope
mag – Magnometer
tmp – Temperature
hum – Humidity
prs – Pressure
dst – Distance
Please note: The script overwrites the current .csv file, if you don't change the file name (to f.e. "new-2.csv")
import mqtt.*;

MQTTClient client;

Table table;

void setup() {
  client = new MQTTClient(this);
  client.connect("mqtt://try:try@broker.shiftr.io", "processing");
  client.subscribe("p11/dst");

  table = new Table();
  table.addColumn("time");
  table.addColumn("dst");
}

void draw() {
}

void keyPressed() {
  client.publish("/hello", "world");
}

void messageReceived(String topic, byte[] payload) {
  println("new message: " + topic + " - " + new String(payload));

  String str = new String(payload);
  int dst = Integer.parseInt(str);

  TableRow newRow = table.addRow();
  newRow.setInt("time", millis());
  newRow.setInt("dst", dst);

  saveTable(table, "data/new.csv");
}